From window sealants and caulking to expansion joints, explore this straightforward guide to the process and pricing of sealant replacement on your building. Whether you manage a high-rise, sit on a strata council, or own a commercial building, understanding the per linear foot costs associated with this type of essential building maintenance is essential for protecting your investment and preventing more serious damage and repairs down the road.
Get expert insights into what is involved in the replacement process, how we price out the work, and which factors can increase or lower the cost for your project.
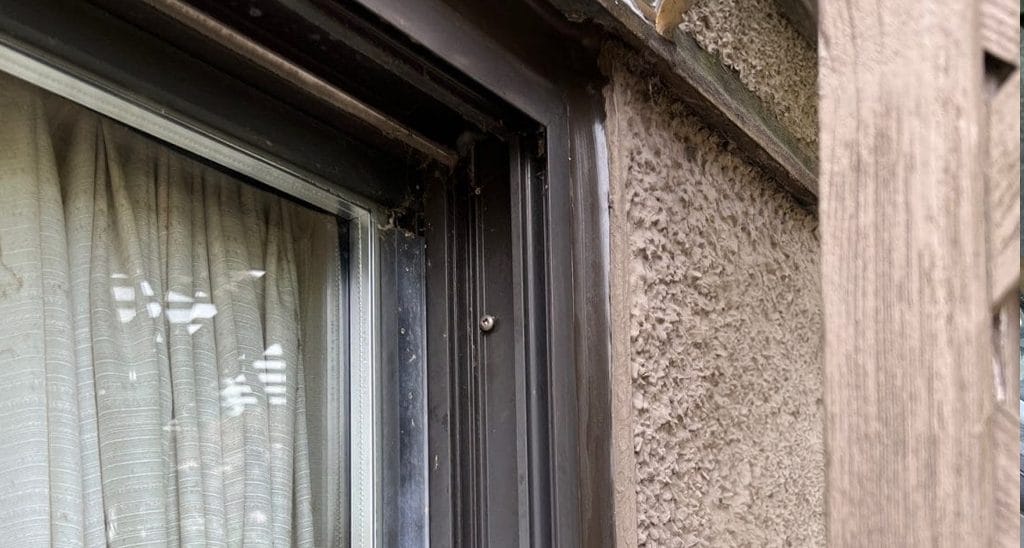
3 most common areas of a building where sealant failure occurs
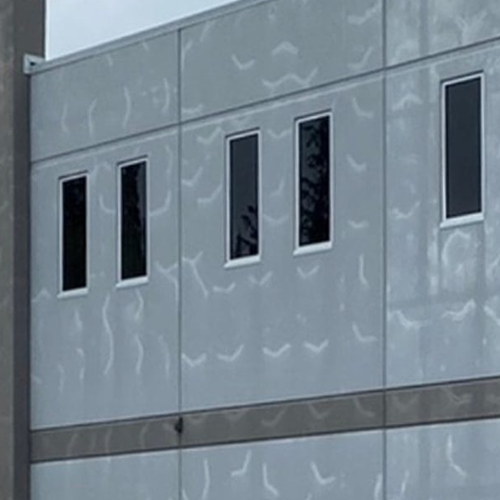
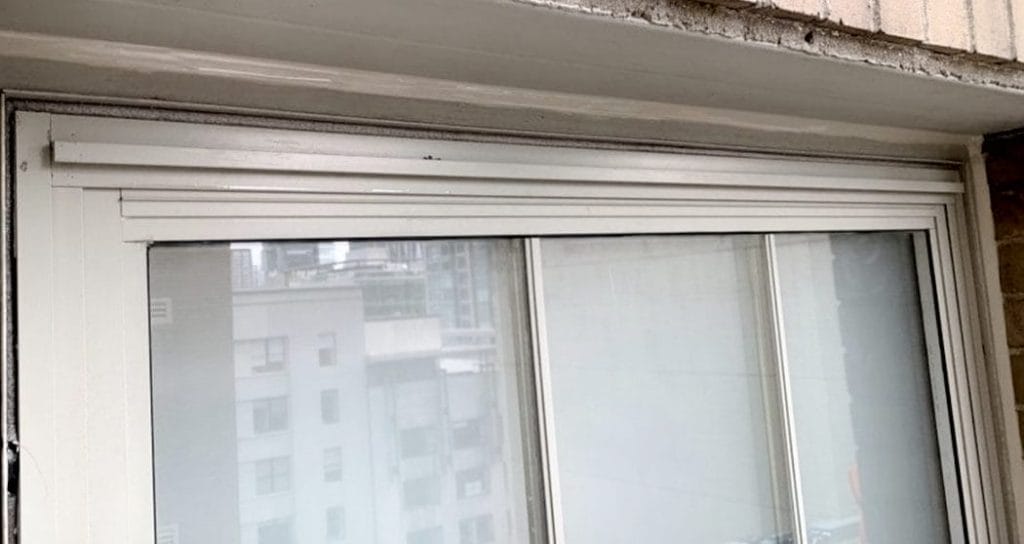
+ Window and door perimeters – Gaps or failed seals cause drafts, water leaks, and energy loss.
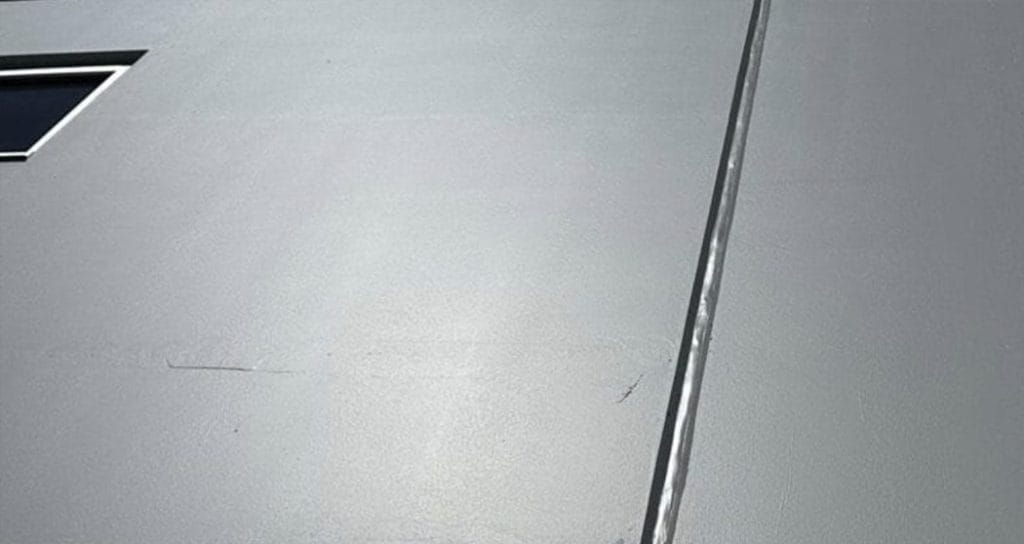
+ Expansion joints – A critical component of a building’s engineering that absorbs structural movement and prevents damage.
+ Cracks and voids – Shifting and settling can cause cracks in walls and cladding that can lead to leaks, energy loss, and further damage.
Not all joints are the same – here’s the difference
Expansion joints: Engineered specifically between 2 slabs (like a wall and a floor) to allow structural movement such as seismic shifts, and thermal expansion. The intentional movement of an expansion joint actually prevents damage and a critical part of a building’s structural integrity.
Control joints: These are shallow saw cuts or grooves cut into the concrete that actually direct inevitable cracking to where you want it to happen as the concrete shrinks or settles. (Look for control joints every 5-7 feet on the sidewalk next time you’re out for a walk).
Cold joints: Cold joints occur where two separate concrete pours meet, like where foundation walls meet floor slabs. Because the two surfaces cure at different times, they may not bond properly, making that joint a point of weakness or water ingress if not properly sealed.
Understanding exterior caulking and why professional replacement pays off
Caulking and sealants are crucial for keeping a building watertight, protected, and energy-efficient. Exterior, restoration grade sealants are used to repair cracks, fill gaps, and protect joints around windows, doors, cladding transitions, and expansion joints, and require skilled installation. (This is different from decorative exterior caulking, which is used around trim work and other non-structural elements for appearance, often during the painting process.)
With the information in this article, you should be able to understand all the factors that can influence the price per linear foot, keeping in mind that every building has its own set of requirements depending on conditions, material requirements, substrate repairs, and more.
Step by step: Here’s how we do it, right from the start
Understanding the factors to be considered in estimating the cost of replacing the caulking on your building.
Site evaluation and scope definition
A thorough site evaluation is essential. We begin by defining the scope of the work to be completed, including expansion joints, window perimeters, and crack repair. We carefully assess and inspect the condition of the existing sealant. Dried-out or cracked sealants can increase removal and replacement times and affect pricing.
Here we will also determine what isn’t included in the scope, like sealing gum, lip flashing, or specialty repairs.
Measuring the linear footage
Because caulking and sealants are applied along long, narrow gaps or seams, the total length of material required is calculated in linear feet, versus by square foot as in broad surfaces. The total length of all joints, perimeters, and cracks to be addressed is measured to estimate materials and labour needs.
Equipment planning and access
The building’s height and layout, and the surrounding environment, can determine whether ladders, scaffolding or rope access is required. Equipment like swing stages and boom lifts requires certified operators and extra setup time, all of which can affect cost and scheduling.
Different buildings involve different types of access
- Townhome complexes and low-rise buildings usually require ladders, scaffolding, or scissor lifts.
- High-rises typically require rope access or swing stages, which involve engineered anchoring systems attached to the roof, including davits, parapet clamps, and tie-back anchors. Work from heights can be dangerous, and so, jobs of this sort are performed by professionals with proper fall protection and equipment certifications.
- Commercial buildings, complexes, and warehouses usually require scissor lifts, scaffolding, or articulated boom lifts for broad flat walls.
Restoration and Surface Preparation
A proper caulking job goes beyond just applying new sealant. If there have been leaks or water damage, assess what caused the original system to fail. We ensure the underlying issues are addressed and surfaces are properly prepped for long-term performance.
Damaged substrates
Before resealing, all damaged areas where the previous seal failed must be repaired.
- Concrete spalling – may require chipping or cutting out damaged and loose materials, then patching with repair mortar.
- Wood rot – often involves removing and replacing trim work or sheathing.
- Metal surfaces – may require removal of rust and corrosion and patching.
Cleaning and preparing joints
Using appropriate solvents, joints and surrounding surfaces are cleaned of dirt, residue, and debris.
Paint removal and sanding
If old, chipped or loose paint is present, it may need to be stripped or sanded away to expose the substrate surface for best sealant adhesion.
Prime time
Porous or previously coated surfaces will require a joint primer for proper bonding before new sealant can be installed.
Selecting the right sealant
Choosing the right caulking and sealant for the conditions, materials, and applications is critical for long-term performance and durability. Here’s a breakdown of the most commonly used sealants (and where they do, and don’t belong).
- Latex and elastomeric sealants
Best for decorative and non-critical joints like trim, siding transitions, or cosmetic touch-ups. These are fairly common products like DAP Dynaflex 230, which are paintable and easy to apply, but not suitable for high-movement or waterproofing applications. While they are often used around doors and windows in residential settings, they are not intended for restoration-grade sealing. - Polyurethane sealants
Often the go-to for restoration and waterproofing work, they are ideal for expansion joints and door and window perimeters on commercial and multi-family structures. Products like Dymonic 100 or Dymonic FC are flexible, durable, and will adhere well to a wide range of substrates like concrete, masonry, wood, and metal. Polyurethane sealants offer excellent UV and weather resistance, with the proper surface prep and curing conditions. - 2-component foam and epoxy systems
Specialty products used for repairing cracks and structural repairs, particularly in concrete. Systems like SealBoss can be used to prevent drafts and moisture infiltration by bonding structural cracks or filling deep voids. Epoxies offer reliable repair strength, while foams are used to fill and seal leaks that are still moist or under pressure. Neither of these is typically used for surface joints or where flexibility is required.
*A note about silicone sealants
While silicone is popular due to its durability and flexibility, it can be inherently problematic for restoration projects. It can not be painted, it resists bonding with new sealants, and it can cause adhesion issues with surrounding materials. Unless specified by an engineer, it should not be a default option for exterior caulking projects.
Staging and mobilization
Before any work can begin, the site and surrounding area has to be properly staged to ensure safety, efficiency, and compliance of local regulations. This can include:
- Pedestrian protection – especially in high traffic areas like walkways or building entrances.
- Equipment and materials access – boom lifts, scaffolding, materials, and tools must be kept safely on-hand but not in the way.
- Fencing, hoarding, and signage are often required to prevent unauthorized access and ensure clear communication of possible hazards.
The process at a glance: How failed sealant is replaced
As you can see, replacing failed sealant isn’t just about squeezing new caulking into a crack or seam. It’s a detailed process that, when done correctly, ensures long-term protection of your property.
1) Site assessment
We inspect and identify areas where sealant is failing, consider access methods needed, and define the scope of work.
2) Access setup
Plan and set up access equipment like ladders, swing stages, and boom lifts based on building height and conditions. Ensure a well-defined safety plan and fall protection equipment is secured.
3) Old sealant removal
Using blades and or grinders, old, failed sealant is carefully cut out and removed from joints, perimeters, and cracks. Affected joints are carefully cleaned down to the substrate.
4) Joint cleaning and preparation
Once the old sealant has been removed, joints are thoroughly cleaned to remove dust, debris, and contaminants to ensure the new sealant gets a proper bond with the substrate.
5) Applying new caulking
We recommend and apply the appropriate type of restoration-grade sealant, tooling it to ensure proper adhesion and a watertight seal.
6) Cleanup and inspection
After curing to manufacturer’s specifications, we perform a visual and adhesion check, tidy up surrounding areas. On-site debris is cleaned up, equipment is dismantled, and fencing is removed.
Let’s talk numbers
A look at typical by-the-foot pricing for caulking and sealant replacement.
As mentioned, each building is unique, and pricing can vary based on access, materials, and conditions. While a full-on-site assessment is required for an accurate quote, these ballpark figures can help you prepare, plan, and budget when the time comes.
Window perimeter sealant:? $10 – $16 per linear foot
Depending on window size, access method, and existing sealant condition.
Expansion joints:? $14 – $18 per linear foot
Often requires deep joints, backer rod, and high-performance materials.
Cold joints:? $12 – $20
Typically found at floor and wall transitions, and may require grinding or substrate repair and replacement.
Crack repair (urethane/epoxy injection):? $70 – $150
Higher costs reflect specialty materials, pressure injection, and surface restoration work.
It pays to hire the pros that know Vancouver
Sealant replacement might sound straightforward, but it’s a job that can go sideways without the right experience, expertise, and equipment. Here’s why working with professional contractors like the team at WCP Building Renewal makes all the difference:
Safety first
Our professional crews are fully WorkSafeBC compliant and insured if something unexpected happens on-site.
Built for BC conditions
We understand Vancouver’s wet climate, the materials commonly used here, and how to protect your building against moisture, weather damage, and temperature shifts.
Less disruption, more coordination
Our experienced crews know how to work around your schedule to minimize disruption for tenants, visitors, and daily operations.
Warranties you can count on
On top of the manufacturer’s warranties, our work is backed by our PROTECH warranty and maintenance program. This industry-leading warranty and support plan ensures you’re protected long after the job’s done.
We offer up to a 5-year warranty on labour and materials, 2-year maintenance follow-ups, detailed completion certificates, and detailed maintenance manuals.
Plan your next repair or renewal project with confidence
For more information on our sealant removal and replacement services, or to request a quote for your property, contact us at [email protected] or call us at 604-420-5552
Protect your property and plan with confidence. Reach out today for a free, no-obligation quote.